CapCut Mastery: 40 Editing Tips For NEXT LEVEL Edits.
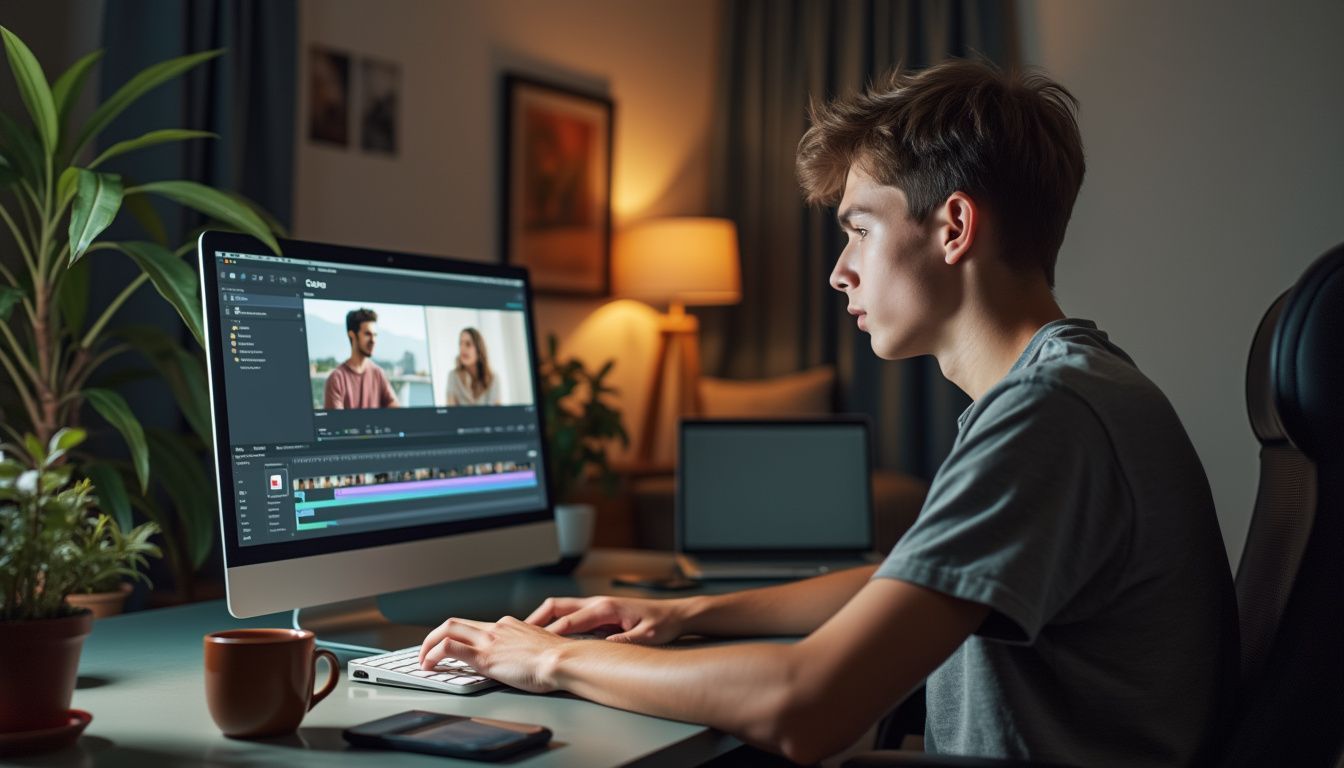
Are you struggling to make your videos stand out on social media? CapCut is a popular video editing app that can help. This blog post offers 40 easy CapCut tips to level up your edits.
You'll learn how to remove the default ending, add cool effects, and use AI features. Get ready to create amazing videos with these CapCut hacks.
Key Takeaways
- CapCut offers 40 editing tips to improve your videos, from basic to advanced levels.
- Essential techniques include removing the default ending, turning long videos into shorts, and selecting appropriate music.
- Intermediate strategies involve using AI tools, adding memes and GIFs, and implementing keyframe movements.
- Advanced skills cover mastering transitions, effective captioning, and utilizing AI for voice overs.
- Professional tips include using the back button, creating engaging thumbnails, and implementing green screen effects.
Essential CapCut Editing Techniques

Essential CapCut Editing Techniques are key to creating great videos. These tips will help you make better content with this popular app.
https://www.youtube.com/watch?v=yu1jEv3w2WQ
Removing the Default CapCut Ending
CapCut adds its logo at the end of every video by default. This can be annoying for users who want a clean finish to their content. Luckily, there's an easy fix. You can turn off this feature in the app's settings.
To remove the CapCut logo, open the app and go to the settings menu. Look for the option that says "add default ending." Simply toggle this off. Now, your videos will end without the CapCut branding.
This small change can make your videos look more professional.
This tip is great for new editors who want to create polished content. It's a quick way to improve your videos without any extra work. Plus, it keeps the focus on your content, not the editing software you used.
Transforming Long Videos into Shorts
Turning long videos into shorts is a key skill for CapCut users. First, tap the ratio button and pick 9x16 format. This size works great for TikTok, YouTube Shorts, and Instagram Reels.
Next, you'll need to trim your video down to the best parts.
CapCut makes it easy to cut out boring sections. Just drag the handles on your video timeline to keep only the most exciting bits. You can also split your video into chunks and delete the parts you don't want.
This helps you create a snappy short that grabs viewers' attention.
To fit everything in the frame, use the pinch gesture on your screen. This lets you adjust the video size quickly. You might need to zoom in on important details or zoom out to show more of the scene.
With these simple steps, you can turn any long video into a catchy short that's perfect for social media.
Selecting Appropriate Music
Music can make or break your video. CapCut offers many songs, but they're only for TikTok use. For other platforms, you need different options. Third-party sites like Epidemic Sound give you more choices.
They have over 40,000 songs and 90,000 sound effects to pick from.
The right music can elevate your video from good to great.
Choose music that fits your video's mood and pace. Upbeat tunes work well for fun videos, while slower songs suit serious topics. Make sure the music doesn't overpower your main audio.
Keep the volume balanced so viewers can hear both the music and any talking clearly.
Designing a Zoom-in Introduction
A zoom-in intro grabs viewers' attention right away. To make one in CapCut, pick your video first. Then, tap the "Animation" button and choose "Zoom 2" from the in-animation options.
This simple trick adds a pro touch to your video's start. It pulls people in and makes them want to keep watching. You can play with other zoom styles too, to find what fits your video best.
Applying Pre-made Templates
CapCut offers pre-made templates to make video editing easier. These templates save time and give your videos a pro look. You can find them right in the app.
To use a template, open CapCut and tap the "Templates" button. Browse through the options or use the search bar to find a specific style. Pick a template you like and tap "Use Template" to add it to your project.
Templates come with preset effects, transitions, and text. You can change these parts to fit your video. Add your own clips, adjust the timing, and tweak the colors. This way, you'll create a unique video that stands out.
Recording Directly in CapCut
CapCut offers a handy camera app feature for direct filming. This tool lets you record clips right inside the app. You don't need to switch between apps or import videos later. It's a simple way to start your editing process faster.
The camera feature in CapCut is easy to use. You can film short clips or longer videos as needed. Once you finish recording, your clips appear in your project timeline. This saves time and makes editing smoother.
You can start working on your video right away without extra steps.
Direct recording in CapCut is great for quick edits. It's perfect for making short videos or social media posts. Beginners will find this feature helpful for learning basic editing skills.
With practice, you can create fun videos using only CapCut's built-in tools.
Using the Teleprompter Feature
After recording directly in CapCut, you can use its teleprompter feature for smoother delivery. This tool helps you read your script while filming. You can adjust the text size, speed, and color to suit your needs.
The built-in teleprompter lets you customize your content easily. It's great for making scripted videos without memorizing lines. This feature saves time and helps create more polished content.
Intermediate CapCut Editing Strategies
Intermediate CapCut editing strategies take your skills up a notch. These tips help you create more polished and eye-catching videos. Keep reading to learn how to use advanced features and tools in CapCut.
https://www.youtube.com/watch?v=TnnQRfQafVA
Utilize Admaker Pro for Professional Purposes
Admaker Pro offers advanced editing tools for business and content creators. This powerful software helps make high-quality videos that look professional. Users can create content for various platforms with ease.
Admaker Pro streamlines the editing process, saving time for busy professionals. It provides many features to enhance video projects. These include special effects, transitions, and audio tools.
The software supports different video formats, making it flexible for various needs.
Content creators can boost their skills with Admaker Pro's advanced techniques. The software allows for complex edits that stand out on social media. With practice, even beginners can produce polished videos that impress viewers.
Employ AI Image Generator
Moving from Admaker Pro, CapCut offers another cool tool: the AI Image Generator. This feature lets you make unique pictures from your photos. It's a great way to add flair to your videos without needing fancy art skills.
The AI Image Generator works like magic. You pick a photo, and the AI turns it into something new and exciting. You can create cartoon versions of people or turn landscapes into paintings.
This tool gives your videos a fresh look that will grab viewers' attention.
AI-made images can spice up your edits in many ways. Use them as fun backgrounds, eye-catching transitions, or even as main parts of your story. The AI Image Generator opens up a world of creative options for your CapCut projects.
With this tool, you can make videos that stand out from the crowd.
Integrating Memes into Your Videos
Memes can spice up your videos and make them more fun. To add memes, use your device's screen recorder to capture them. Then, bring these memes into CapCut and place them at the right spots in your video.
This easy trick will grab viewers' attention and add humor to your content. Memes work great for reaction shots or to highlight funny moments in your footage.
Next, we'll explore how to add GIFs to make your videos even more eye-catching.
Adding GIFs for Visual Appeal
GIFs add fun and flair to your CapCut videos. You can easily grab GIFs from the Giphy app and drop them into your projects. These moving images catch viewers' eyes and make your content more lively.
Try using GIFs to show reactions, highlight key points, or just add some humor to your edits.
GIFs work great for many types of videos. You might use them in vlogs, tutorials, or social media posts. The key is to pick GIFs that fit your video's mood and message. Please don't overdo it, though.
A few well-placed GIFs can make your video pop without being too distracting.
Implementing Keyframe Movements
Moving from GIFs to keyframes takes your videos up a notch. Keyframes add smooth motion to your clips in CapCut. This tool lets you change how things look over time.
To use keyframes, pick a spot in your video. Then, set how you want things to look there. Next, move to another spot and change the look again. CapCut will fill in the middle, making the change smooth.
You can move objects, change colors, or adjust size this way.
Keyframes work great for text too. Make words fly in, grow bigger, or fade out. Play around with different effects to see what looks best. The more you practice, the cooler your videos will get.
Enhancing Audio with Noise Reduction
After mastering keyframe movements, let's focus on improving your video's sound quality. Audio plays a big role in making great videos. CapCut offers a handy tool to make your sound better: noise reduction.
Background noise can ruin good footage. It might be wind, traffic, or chatter. The reduce noise feature in CapCut helps fix this problem. It removes unwanted sounds and makes voices clearer.
This tool is easy to use, even for beginners.
To use noise reduction, select your audio clip in CapCut. Look for the "Audio" option and find "Reduce noise." Slide the bar to adjust how much noise you want to remove. Test different levels to find the best sound for your video.
With cleaner audio, your viewers will enjoy your content more.
Incorporating Canva Stickers
CapCut offers many sticker options, but you can get even more through Canva. Adding Canva stickers to your videos is easy and fun. First, save the stickers you like from Canva to your device.
Then, import them into CapCut as overlays. Place the stickers where you want them in your video timeline. You can resize, rotate, and adjust the stickers to fit your needs.
Canva stickers can make your videos pop with color and personality. They work great for highlighting key points or adding humor. Try using animated stickers to draw attention to specific parts of your video.
Mix different sticker styles to create a unique look that matches your content. With practice, you'll find creative ways to use Canva stickers in your CapCut edits.
Tracking Faces Automatically
Moving from Canva stickers, let's explore another cool CapCut feature. Face tracking makes your videos pop. This tool follows faces as they move on the screen. It's great for adding fun effects or text that stays with the person.
CapCut's auto face tracking is easy to use. You pick the face you want to track and the app does the rest. This saves time and makes your videos look pro. Try it on vlogs or reaction videos to keep viewers hooked.
Face tracking adds a dynamic touch that will make your edits stand out.
Advanced Techniques for CapCut Experts
Advanced CapCut tricks take your edits to new heights. Learn how to make your videos stand out with pro-level skills. Keep reading to boost your CapCut game and create stunning content.
https://www.youtube.com/watch?v=mlm4VyYpI2k
Mastering Transitions
Transitions make your videos flow smoothly. They help connect scenes and keep viewers engaged.
- Use basic cuts: Start with simple cuts between clips. This works well for quick changes or action sequences.
- Try fade transitions: Fade to black or white between scenes. This creates a soft, gradual change that's easy on the eyes.
- Add wipe transitions: Swipe from one scene to the next. This adds a fun, dynamic feel to your video.
- Experiment with zoom transitions: Zoom in or out between clips. This creates depth and draws attention to key elements.
- Use shape transitions: Shapes like circles or squares can reveal new scenes. This adds a unique, creative touch to your edits.
- Match action across cuts: Line up similar movements in two clips. This creates a smooth flow and keeps viewers focused.
- Play with speed changes: Slow down or speed up clips during transitions. This adds visual interest and controls pacing.
- Blend scenes with overlays: Use overlapping images or video. This creates a dreamy, artistic effect between scenes.
Now let's move on to effective captioning techniques in CapCut.
Effective Captioning Techniques
Captions make videos more accessible and reach a wider audience. CapCut offers easy ways to add auto-captions to your videos. You can edit these captions to fix any errors and make sure they match your audio perfectly.
For better reach, try using bilingual captions. This lets viewers who speak different languages enjoy your content. Clear, accurate captions help keep viewers engaged and make your videos more professional.
To make your captions stand out, play with font styles, sizes, and colors in CapCut. You can also move captions around the screen for visual interest. Keep them short and easy to read.
Break long sentences into smaller chunks. This helps viewers follow along without getting lost. Good captions can turn a good video into a great one that appeals to more people.
Utilizing AI for Voice Overs
Moving from captions to voice, AI can now speak your text. CapCut offers AI voiceovers for text clips. This tool turns written words into spoken audio. You can pick from many voices and languages.
AI voiceovers save time and add a pro touch to your videos.
AI voices sound natural and clear. They read your text with the right tone and pace. You can adjust the speed and pitch to fit your needs. This feature helps if you don't want to use your own voice or need a different language.
It's great for explainer videos, tutorials, and social media content.
Using the Drawing Tool Creatively
CapCut's drawing tool adds a fun twist to your videos. You can sketch, doodle, or write on your clips to tell a story. This tool lets you highlight parts of your video or add funny comments.
It's great for making your content more engaging.
To use the drawing tool, tap the pencil icon in CapCut's editing menu. Pick a color and brush size that fits your style. You can draw directly on your video frames or add text with cool effects.
The tool lets you erase mistakes easily, so don't worry about messing up.
Get creative with your drawings! Use arrows to highlight details, circle important parts, or add speech bubbles to characters. You can even create simple animations by drawing frame by frame.
Next, we'll look at how to manage backgrounds and use duplication in CapCut.
Managing Background and Duplication
CapCut lets you remove video backgrounds with ease. This cool trick opens up many fun options for your edits. You can swap out boring backgrounds for exciting new ones. Try putting yourself on a beach or in outer space!
Duplication is another neat feature in CapCut. It allows you to clone yourself in videos. Imagine having a twin or even triplets in your clip! This effect works best when you use the remove background tool first.
Then you can place your clones wherever you want in the frame.
These tools give beginners a chance to make pro-level edits. Play around with different backgrounds and clone effects to create unique videos. Your viewers will be amazed at what you can do.
Next, let's explore how to use CapCut's body effects for even more creative options.
Applying Body Effects
Moving from background management, let's explore body effects in CapCut. Body effects add fun and flair to your videos. CapCut offers many options to spice up your footage.
You can apply effects like sparkles, flames, or neon outlines to people in your video. These effects track movement, sticking to the body as it moves. This feature works great for dance videos or action shots.
Try different effects to see what fits your style best. With practice, you'll create eye-catching videos that stand out.
Including B-roll for Depth
After adding body effects, you can boost your video's depth with B-roll. B-roll is extra footage that adds context and interest to your main shots. It helps tell your story better and keeps viewers engaged.
For example, if you're talking about coffee, you might show clips of brewing or people sipping from mugs.
B-roll makes your videos more professional and fun to watch. You can film your own B-roll or use stock videos from apps like Pexels. Just make sure the B-roll fits your topic and flows well with your main footage.
This simple trick can take your CapCut edits to the next level.
Practical Use of B-roll
B-roll adds depth and interest to your videos. It shows extra footage that supports your main content. You can use B-roll to cover cuts, hide mistakes, or add visual appeal.
For beginners, finding a good B-roll is easy. Search for "Chicago" on Pexels to get great drone shots for vlogs. You can download these videos and edit them in CapCut. This gives your project a good look without the cost of filming yourself.
Mix B-roll with your main footage for the best results. Use it to show what you're talking about or to set the scene. Short clips work well - just a few seconds can make a big difference.
With practice, you'll learn how to blend B-roll smoothly into your edits.
Professional Tips for CapCut Users
Professional tips elevate your CapCut skills significantly. These techniques help you create stunning videos that stand out. Learn how to use advanced features and make your edits shine.
Explore these expert tips to enhance your CapCut abilities. Continue reading to discover the full potential of this powerful editing app.
Mastering the Back Button
The back button in CapCut is a lifesaver for beginner editors. It lets you undo mistakes quickly. Did you delete a clip by accident? No problem. Just tap the back button to bring it back.
This tool also helps fix misplaced clips. You can move things around and use the back button if you don't like the change.
Learning to use the back button well makes editing smoother. It gives you the freedom to try new things without fear. You can test different effects or transitions easily. If they don't work out, simply hit back and start over.
This feature saves time and stress in your editing process.
Crafting Engaging Thumbnails
Thumbnails grab viewers' attention and make them click on your video. CapCut offers tools to create eye-catching thumbnails right in the app. You can edit photos and add text to make your thumbnail stand out.
For YouTube thumbnails, take a screenshot of your video and use it as a base.
To make your thumbnail pop, use bright colors and clear text. Add your face or an interesting image from your video. Keep it simple but intriguing. A good thumbnail gives viewers a taste of what's in your video without giving everything away.
With CapCut's features, you can craft thumbnails that draw people in and boost your views.
Implementing Green Screen Effects
After creating eye-catching thumbnails, you can add more magic to your videos with green screen effects. Green screens let you replace backgrounds and add cool visuals to your CapCut projects.
You don't need fancy equipment to start. Simply find free green screen videos on YouTube or effect websites.
To use green screen effects in CapCut, first screen record the video you want. Then import it into your project. Next, use the chroma key tool to remove the green background. This reveals only the effect or subject you want to keep.
You can now place this on top of your main video.
Green screen effects open up many creative options. You can transport your subject to any location or add special effects like explosions or magic. Play around with different green screen videos to see what works best for your project.
Soon, you'll make pro-looking videos that grab viewers' attention.
Advanced Green Screen Techniques
Green screen effects can take your CapCut videos to the next level. You can add cool stuff like tigers or spaceships to your clips. First, shoot your video with a solid green background.
Then, in CapCut, use the chroma key tool to remove the green. This lets you put any image or video behind your subject.
To make green screen effects look real, pay attention to lighting. Make sure your subject and the new background have similar light. You can also add shadows or reflections to blend things better.
Try using masks to fine-tune edges and make the effect smoother.
For extra wow factor, add movement to your green screen elements. Use keyframes to make objects move across the screen. This works great for adding flying birds or falling snow. With practice, you'll create amazing scenes that look like they cost millions to make.
Achieving a Cinematic Look with Masking
Moving from green screen effects, let's explore how to make your videos look more cinematic. CapCut offers a simple way to add a movie-like feel to your clips. The masking tool helps create this effect quickly.
To start, open your video in CapCut. Find the masking button and tap it. Choose the "film strip" option to add black bars to your video. These bars give your footage a widescreen look.
You can change the size of the bars by pinching or spreading your fingers on the screen. This easy trick makes your videos look more like they belong on the big screen. Try it out to give your edits a pro touch!
Enhancing Audio with Voice Effects
CapCut offers cool voice effects to make your audio pop. You can find these effects by clicking on your video and scrolling right to the "voice effects" button. This tool lets you play with different sounds for your voice.
You might make it deeper, higher, or even add an echo. These effects can help your video stand out and grab viewers' attention.
Voice effects are easy to use, even for new editors. You can test out each effect to see how it changes your voice. Some popular choices include robot voice, chipmunk, or monster sounds.
These can add fun or drama to your videos. Try mixing effects to create unique sounds that fit your style.
Applying the Retouch Effect
CapCut's retouch effect helps you polish your videos. You can make small tweaks to faces and bodies in your clips. This tool lets you change skin color, warmth, and smoothness. You can also reshape features like noses.
To use this effect, pick a video and tap "retouch". You'll see options to adjust face and body parts. The app offers sliders to control each change. Play around with these to get the look you want.
Keep in mind that subtle changes often work best.
This effect works great for fixing small flaws or enhancing looks. It's handy for vlogs, makeup tutorials, or any video where faces are the focus. Just be careful not to overdo it.
Too much retouching can make people look fake or unnatural.
Setting Up Reaction Videos
Setting up reaction videos in CapCut is simple and fun. First, add your main video clip, like gameplay footage. Next, bring in your reaction video as an overlay. Resize the reaction clip to fit nicely over the main video.
This creates a cool two-in-one effect.
To make your reaction video look even better, use CapCut's masking tool. A square mask works great for most setups. You can move and adjust the mask to place your reaction just where you want it.
This gives your video a pro look without much effort.
CapCut's tools make it easy to sync your reaction with the main video. You can trim, cut, and adjust timing to match your reactions perfectly. With these steps, you'll create engaging reaction videos that viewers will love to watch.
Utilizing Auto Color Grading
After setting up reaction videos, you can boost your video's look with auto-color grading. This CapCut tool makes your footage pop with just a few clicks. Pro users can find it under "adjustments" as "auto adjust." The feature smartly tweaks your video's colors to make them more eye-catching.
Auto-color grading saves time and effort for new editors. You don't need to be a pro to use it. Simply apply the effect and adjust its strength to suit your taste. This tool helps create a polished look without complex editing skills.
It's perfect for beginners who want their videos to look more pro.
Adjusting HSL for Visual Finesse
CapCut's HSL tool lets you fine-tune your video's colors. You can change the hue, saturation, and brightness of specific shades. This feature helps you create a unique look for your clips.
To use it, tap "adjust" on your video and find the HSL option. Pick the colors you want to change and move the sliders. Small tweaks can make a big difference in how your video looks.
Stacking Filters for Unique Effects
CapCut offers a cool way to make your videos pop. You can stack filters on top of each other for unique looks. This means you can use more than one filter at a time. The app lets you mix and match filters to create fresh styles.
To start, pick a filter and adjust how strong it looks. Then, add another filter on top. You can keep adding filters until you're happy with the result. Each filter adds a new layer to your video's look.
This gives you tons of options to make your video stand out.
Try different combos to find what works best. Some filters might clash, while others blend well. Play around with the strength of each filter too. This helps you fine-tune your video's final look.
With practice, you'll create eye-catching effects that grab viewers' attention.
Designing a Memorable End Screen
After stacking filters, your video needs a strong finish. A great end screen keeps viewers hooked and promotes your content. CapCut offers tools to make this easy.
Start by picking a background from Canvas for your end screen. This sets the tone for your final message. Next, shrink your main video and use the mask tool to blend it with the background.
This creates space for extra elements.
Use the free area to add links to other videos or a subscribe button. You can also include social media icons or a call to action. A well-designed end screen turns viewers into loyal fans and boosts your channel's growth.
Conclusion
CapCut offers a world of editing power at your fingertips. These 40 tips will boost your skills from basic to pro level. You'll learn tricks for smooth transitions, eye-catching effects, and pro-quality audio.
With practice, you can create videos that stand out and grab viewers' attention. So grab CapCut and start making amazing edits today!
FAQs
1. What is CapCut and why should I learn it?
CapCut is a free video editing app. It's easy to use and has many tools. Learning CapCut can help you make better videos for social media or fun.
2. How can I find an easy CapCut tutorial?
You can find easy CapCut tutorials online. Look for step-by-step guides or video lessons. These will show you how to use the app's basic features.
3. What are some next-level editing tips for CapCut?
Some advanced tips include using layers, adding effects, and timing your cuts. You can also learn to use transitions and adjust audio. These skills will make your videos stand out.
4. Do I need to be an expert to use CapCut?
No, you don't need to be an expert. CapCut is made for beginners and pros alike. Start with simple edits and work your way up to more complex ones as you learn.
